Setting up your Sandbox
Interactive Ordering
Setting up your sandbox environment is a multi-step process, and may involve multiple ICE Mortgage Technology products, including Desktop version of Encompass (SmartClient), Web Version of Encompass (Encompass Loan Officer Connect), and Encompass Consumer Connect. The steps to configure your sandbox environment are as follows:
- Receiving Encompass admin credentials
Encompass credentials can be obtained after the EPC agreement is in place, by contacting your ICE Mortgage Technology Partner Network Client Success Manager. - Downloading and installing the Encompass Desktop client
You can download the desktop client from this location. If you don't know how to configure it, refer to this guide for help. - Logging in as an administrator:
Once you are logged in as an administrator, you need to:- Provision test users via the Company/User Setup settings. Go to Encompass Settings> click Company/User Setup> Organization/Users. Click the Add New icon to add additional users.
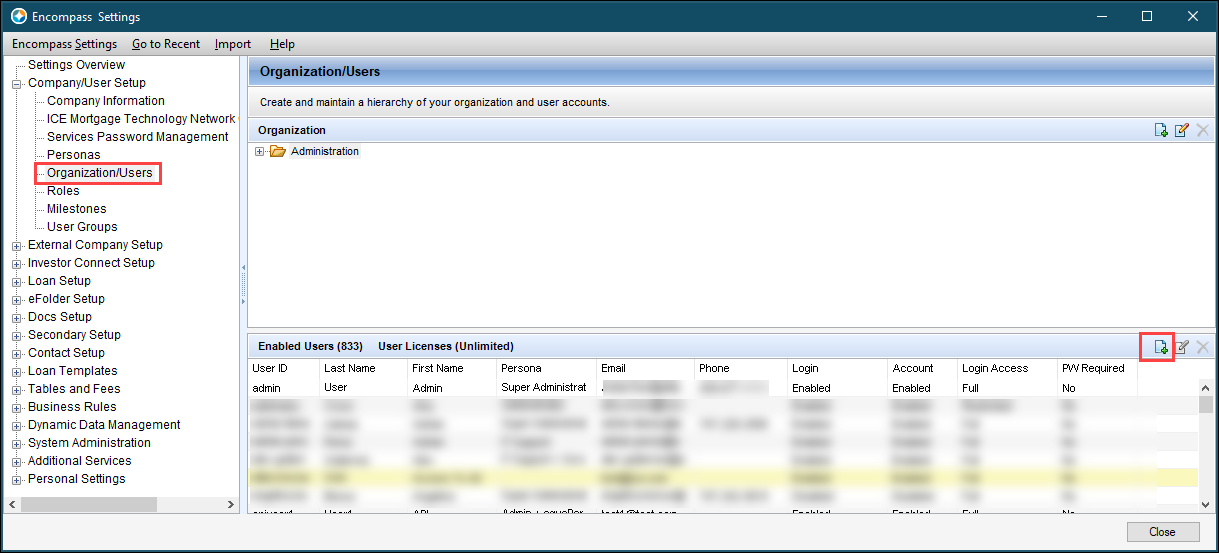
Add users
- Set the appropriate Document Access rules for the admin user. Configure this in the eFolder tab in Personas settings (in Encompass Settings).
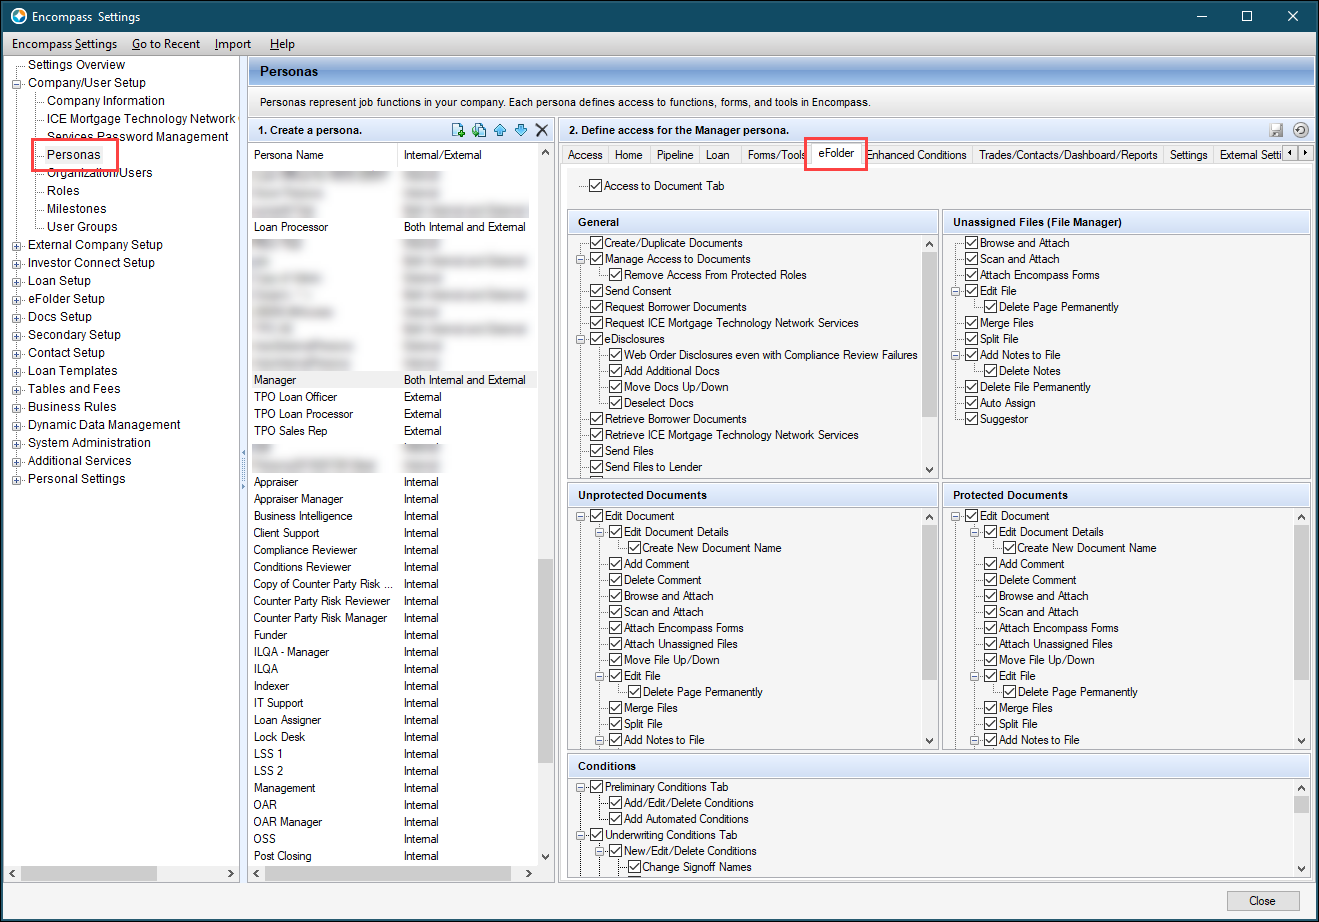
Document access in Encompass is controlled by the persona, and can be managed in the eFolder tab.
- Enable access to Web Version of Encompass as needed. This is also persona-based/configured via the Personas setting in Encompass Settings.
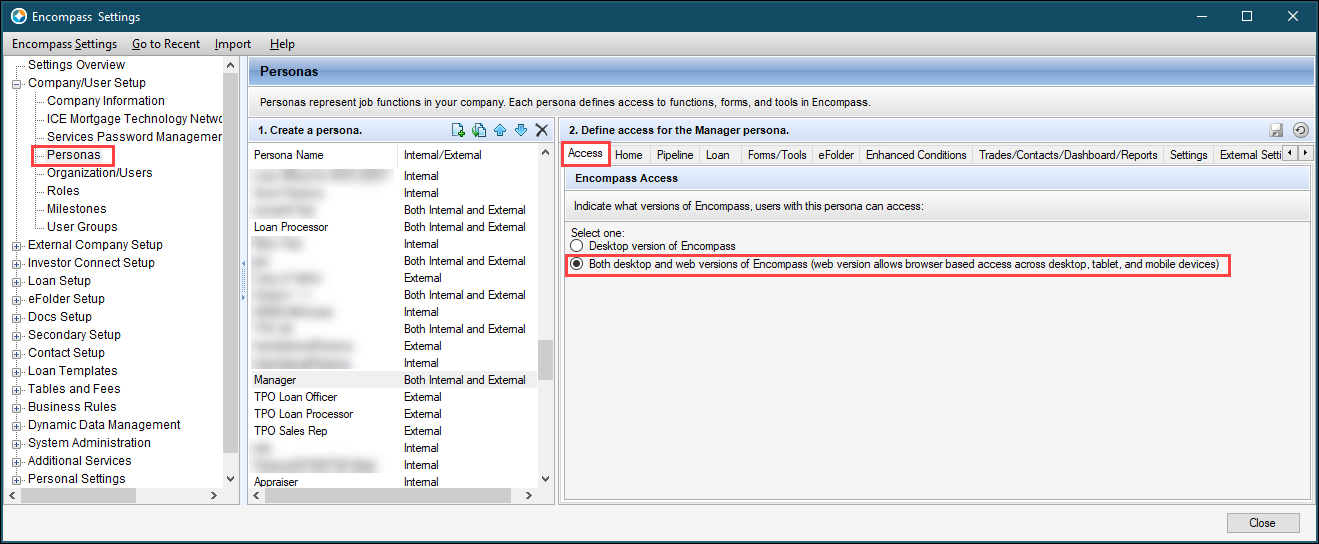
Select the Both desktop and web versions... option in the Access tab to grant a persona access to Encompass (web)
- Enable access to Encompass Consumer Connect as needed. To achieve this, two settings within Encompass Settings need to be configured to control access to Encompass Consumer Connect:
- User Details: At the organization or user level, individual organizations (orgs) and/or users must be granted access to a specific Encompass Consumer Connect website. This is done on the org/user edit screen. Note that orgs and users may be assigned to the Encompass Consumer Connect website directly, or may inherit this setting from a parent organization. See the image below for reference.
For more information, see the Encompass (desktop version) Add a User online help topic.
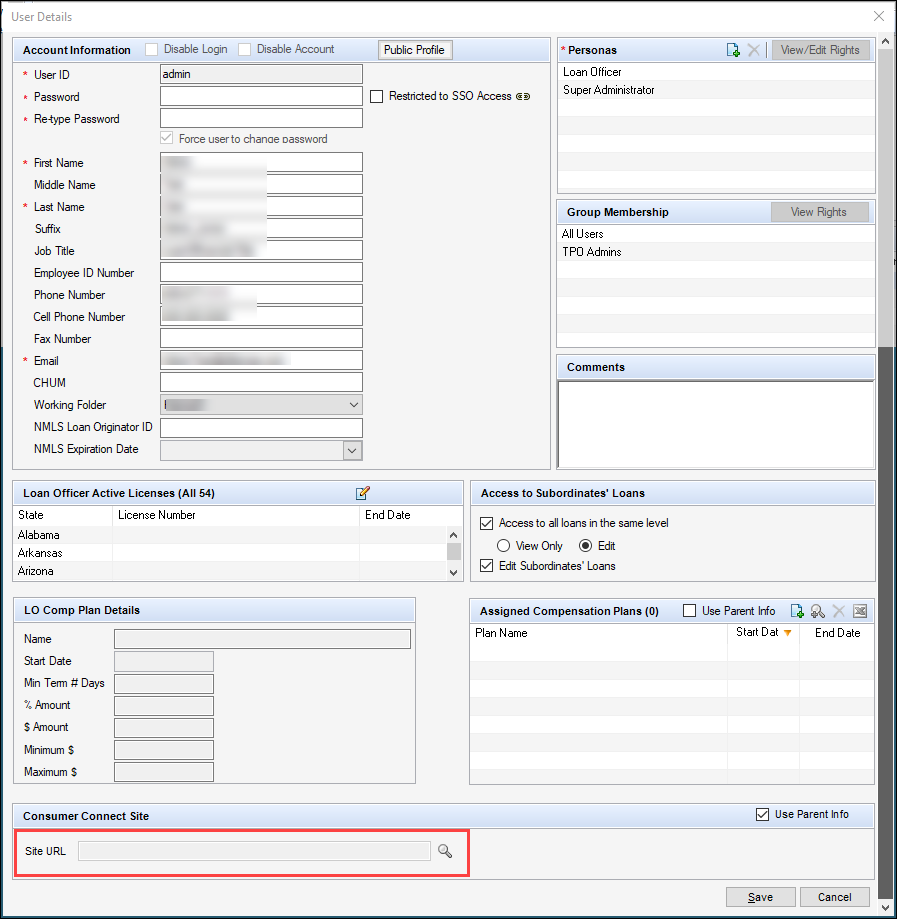
Assigning Encompass Consumer Connect site to user
-
At the persona level, there are additional settings to manage access to Consumer Connect admin features:
-
WebAdmin grants administrator access to the persona. Permissions include full access to the administration portal and website-builder features and functions.
-
WebContent grants partial access to the persona. Permissions include access to the website builder and access to the Manage Sites page of the administration portal. Users cannot create or delete websites or access other pages in the administration portal.
-
WebAssistant - Select this option to enable the persona to log into the Consumer Connect Admin Portal with their Encompass instance ID and user credentials and assist loan officers with incomplete applications and borrower lookups. WebAssistants have limited access to the admin portal compared to personas with WebAdmin or WebContent permissions. WebAssistants can only manage (delete, archive, submit) incomplete applications, view application statistics, access the Borrower Lookup page, unlock borrower accounts, and view document package links. WebAssistant tasks can be further managed/limited by administrators using additional settings in the Consumer Connect admin portal.
-
For more information, see the Consumer Connect section of the Personas online help topic.
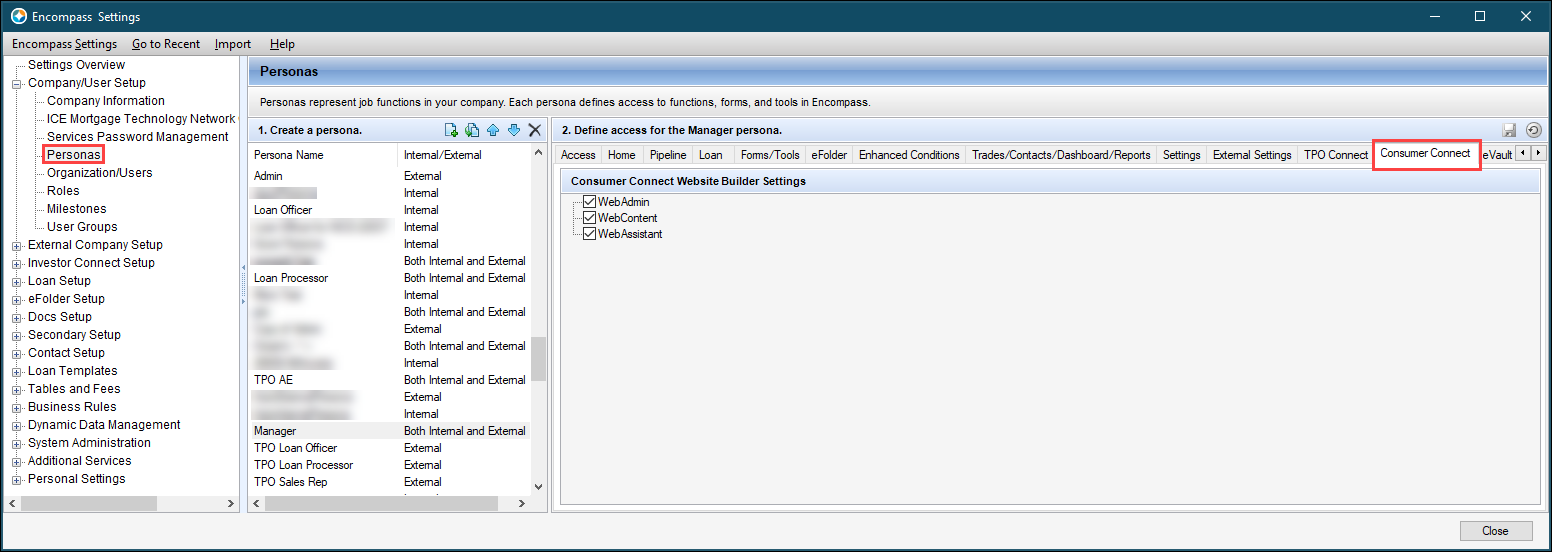
Persona access to Encompass Consumer Connect
-
Disable MFA for your sandbox Web Version of Encompass. During development, to speed up testing efforts, you might need to disable MFA for your Encompass (web version) sandbox if it doesn't contain sensitive data. For more information, see Disabling Ping ID MFA for your Sandbox.
-
Provision your integration in ICE Mortgage Technology products
- Using Web Version of Encompass Services Management setting
To expose your integration product in the web and desktop versions of Encompass, your product must be configured in the Services Management admin setting. For more information, see Launching the Application. NOTE: Listing your integration in the Web Version of Encompass also exposes it in the desktop version of Encompass, and additional configurations in the desktop version will be required.
Automated Service Ordering/1-Click Ordering
Once the manual-ordering sandbox setup is completed, the product can be extended to support Automated and 1-Click Ordering. To set up the sandbox, follow the steps below:
- Add support for Automated and 1-Click Ordering
In your product configuration, addautomatedunder theworkflowsattribute. For more information, see Product Configuration.
"tags": {
            "workflows": [
                "automated",
                "interactive"
            ],
            .
            .
        },
- Register the
adminInterfaceUrl
Add the URL for the pre-configured order options interface to your product configuration. See: Product Configuration.
"adminInterfaceUrl": "{{product_admin_interface_url}}",
-
Turn on the automated service ordering flag for the Encompass instance being used as Sandbox. Contact EPC Support for assistance with this.
-
Create service setup on the Web Version of Encompass:
i ) Log into Web Version of Encompass as admin.
ii) On the left navigation menu, click Services, and then click Services Management.
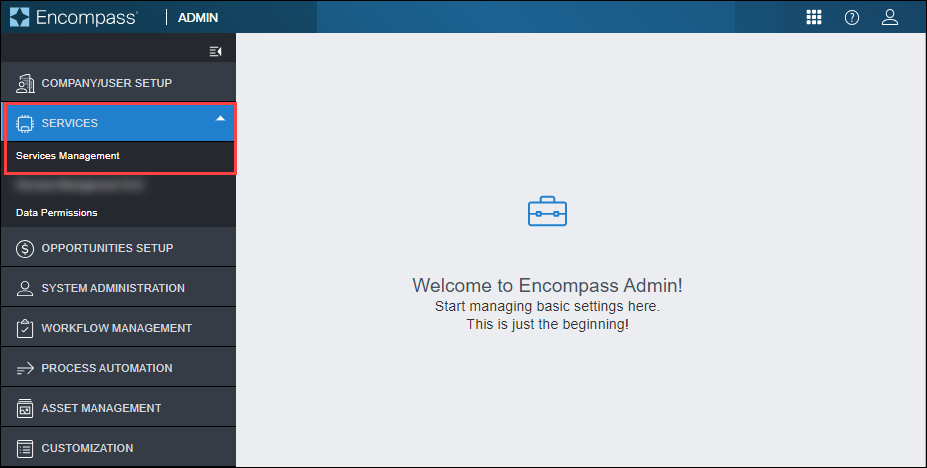
Web Version of Encompass - Services Management
iii) Create a new service setup by going to the category under which that product was listed, then click the Add button.
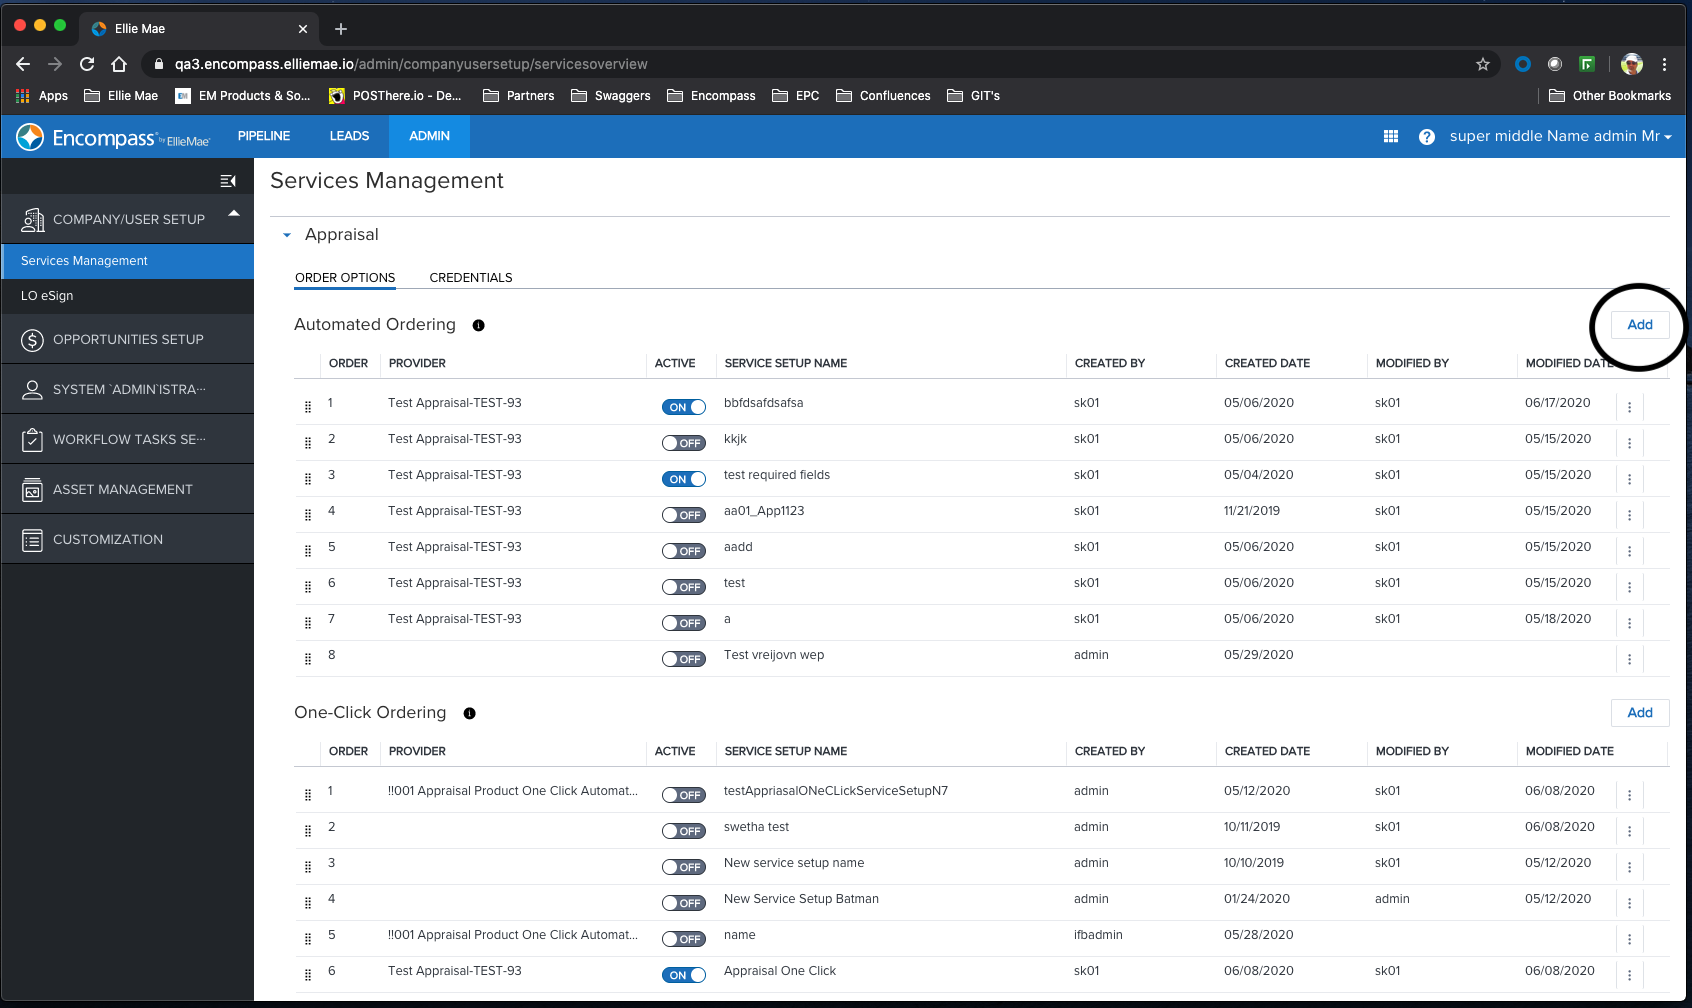
Add a new service setup on the Service Management Page
iv) This takes you to the service setup screen. Here you can specify the service name and automated readiness conditions (the set of loan conditions that will trigger the automation).
v) After providing the necessary information, click the "Add" button under Options to specify the parameters that will be included as part of the transaction.
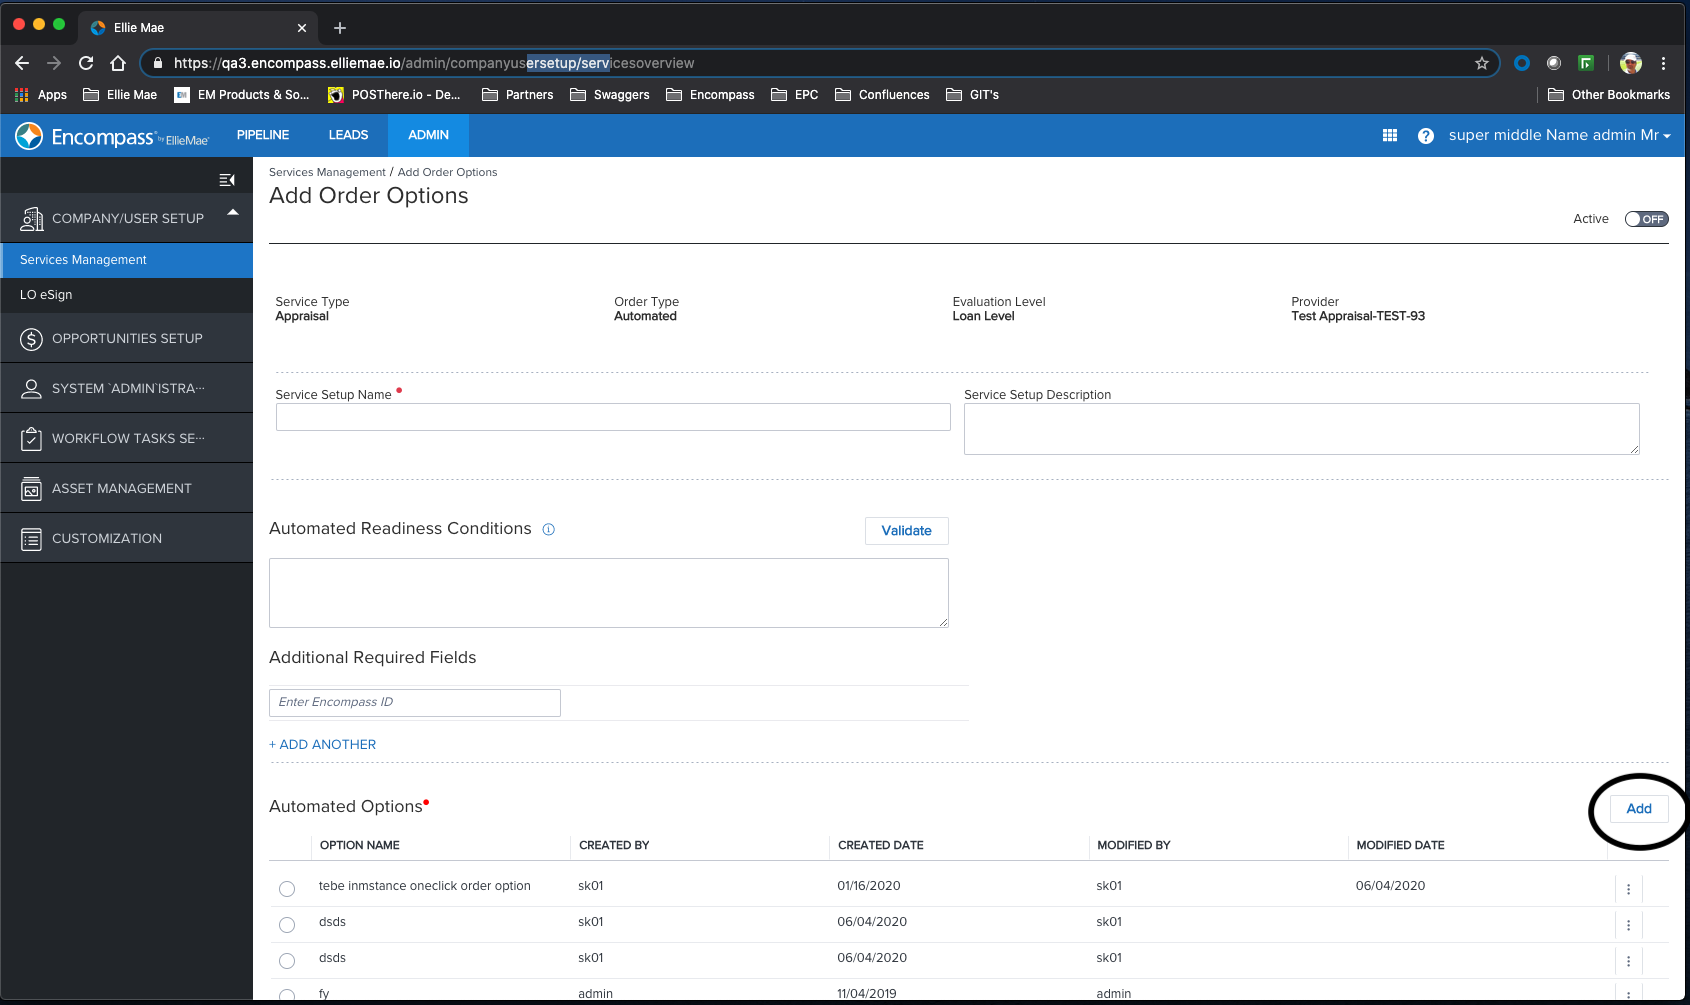
Add product pre-configured options for a service setup
vi) Clicking the "Add" button brings up the pre-configured order options interface listed in the adminInterfaceUrl under the product configuration:
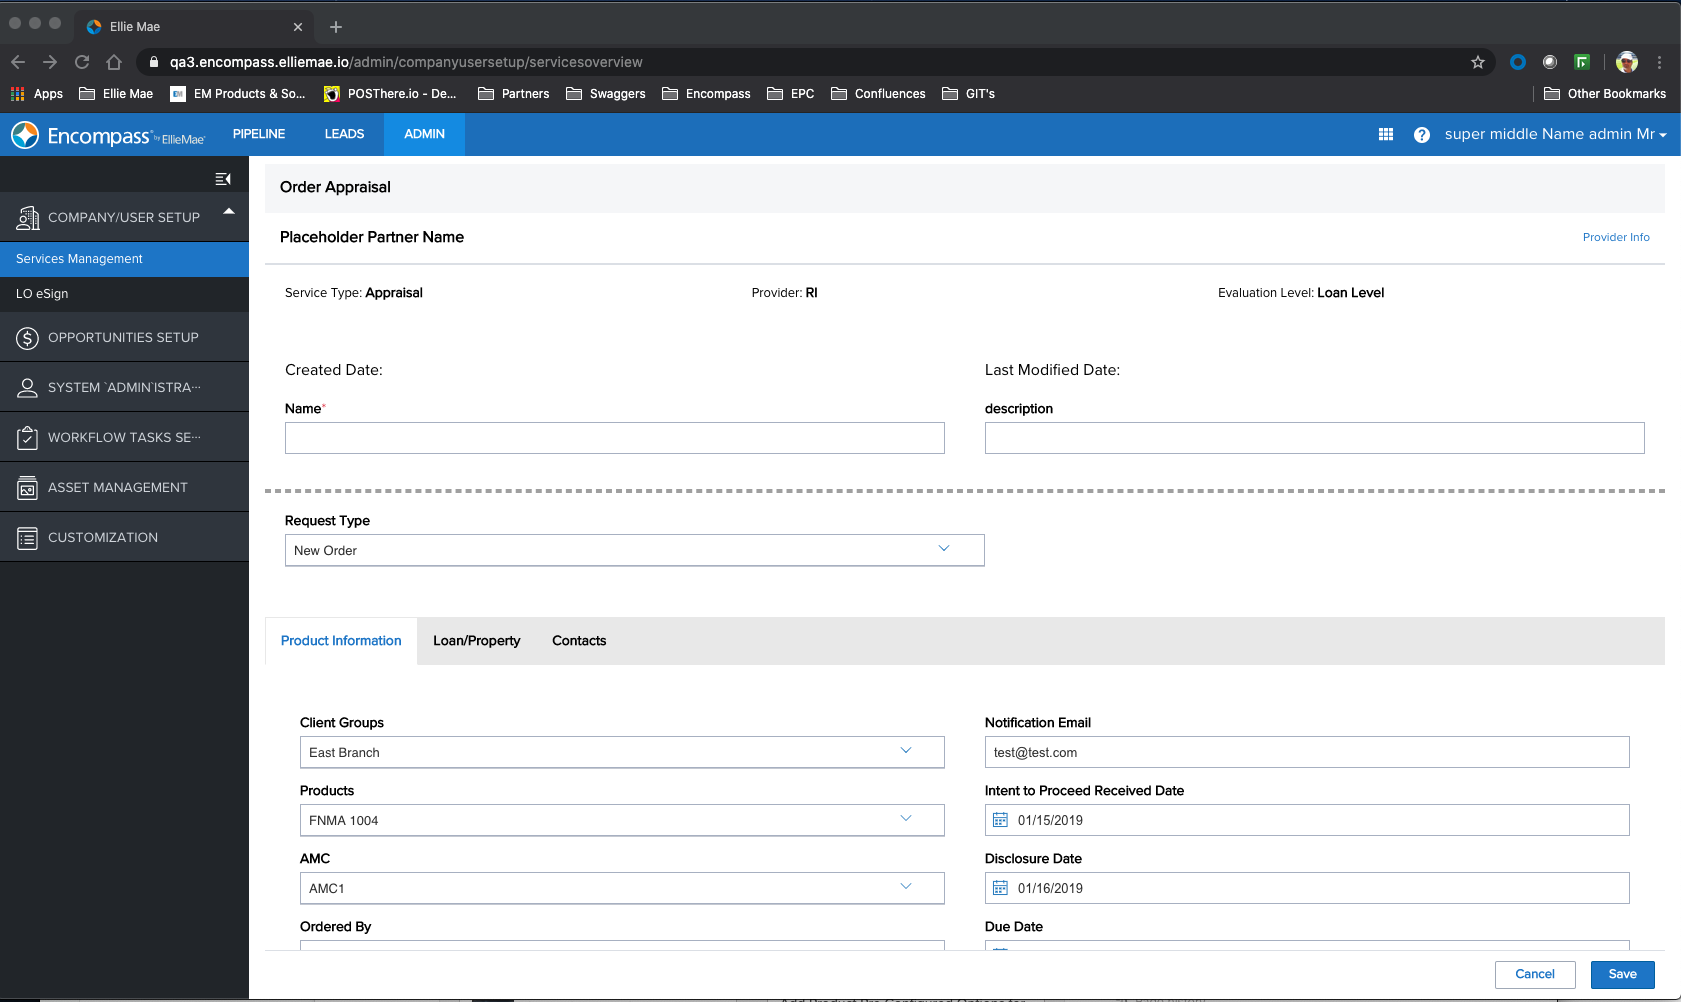
Example of a pre-configured options screen
- Test the setup
Login as a regular LOC user and make the necessary updates to meet the conditions defined above, then save the loan.
- For 1-click Ordering, go to the Services Landing Page for the option to order the service
- For Automated Ordering:
i) Web Version of Encompass: Wait 15 minutes after the initial loan save
ii) Desktop Version of Encompass: Exit the loan and wait 15 minutes
iii) Watch for the Webhook listener endpoint on your end to receive the transaction Webhook. That indicates a successful Automated Ordering setup.
Updated about 2 years ago
