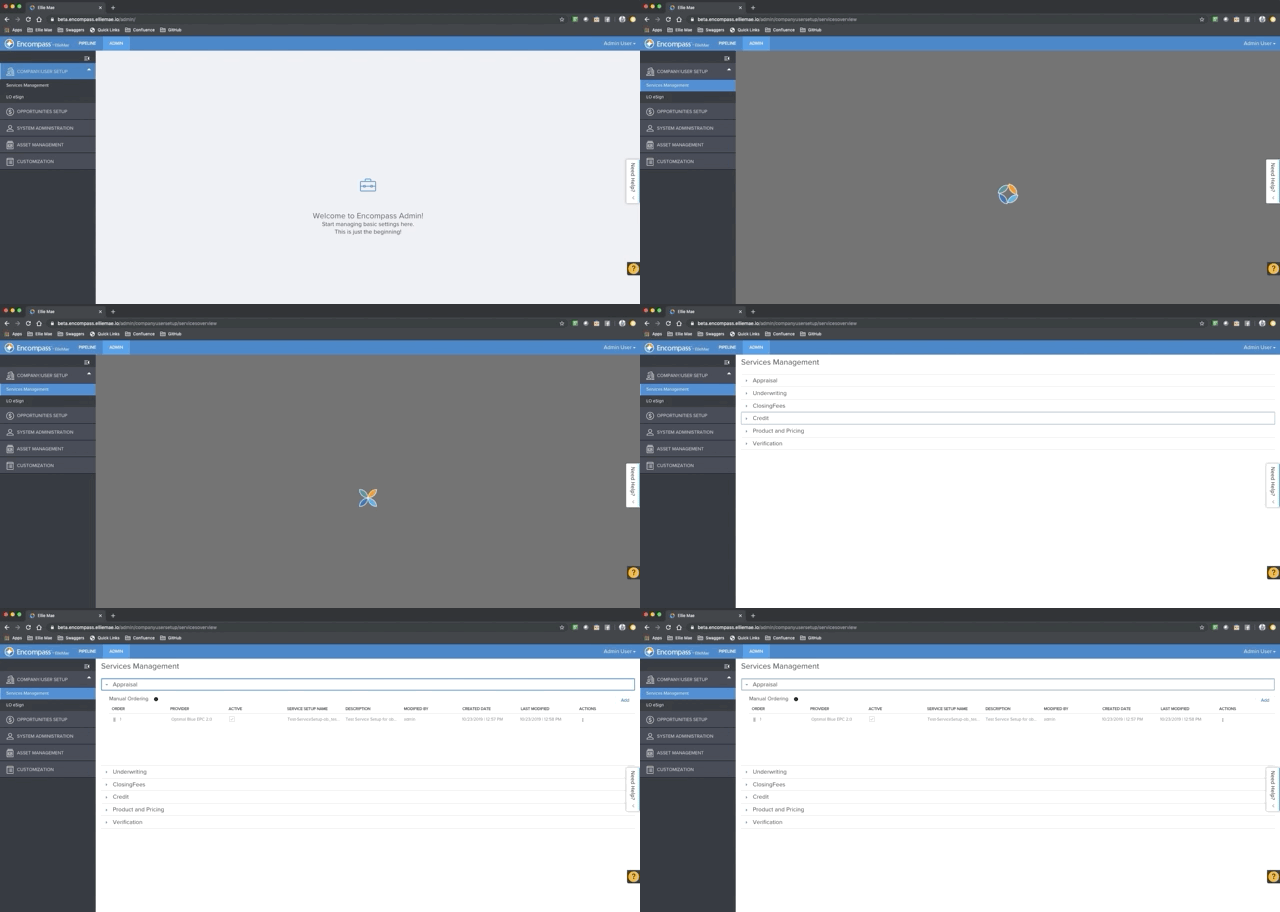
Launching the Application
Install Application and Configure Environment
Step 1: Clone the sample application source
Contact your ICE Mortgage Technology Client Success Manager to get access to the sample application source.
Step 2: Install the necessary dependencies
User-interface
$ cd user-interface
$ npm install
Back-end
$ cd back-end
$ sudo pip3 install virtualenv
The command above installs a very useful dependency for Python development: virtualenv
. virtualenv
helps you create isolated Python application environments. Think of it as a cleanroom, isolated from other versions of Python and dependency libraries.
Create the root directory for your virtual environment:
$ virtualenv venv
You need to activate this virtual environment so you can operate within its scope. The command slightly differs based on your operating system:
$ source venv/bin/activate
$ \PATH\TO\venv\Scripts\activate
Once you activate the virtual environment, (venv)
will appear at the beginning of your shell's prompt. This means you are operating within your Python virtual environment. You will install your application's dependencies in isolation, and run your application in this virtual environment.
Now, install your dependencies:
(venv) $ pip3 install -r requirements.txt
Step 3: Start an instance of the ngrok client
With tunnels configured for localhost:3000
and localhost:8080
$ ngrok start --all
You will see the following output in your shell:
ngrok by @inconshreveable (Ctrl+C to quit)
Session Status online
Account EPC (Plan: Free)
Version 2.3.35
Region United States (us)
Web Interface http://127.0.0.1:4040
Forwarding http://3d5e2d38.ngrok.io -> http://localhost:8080
Forwarding https://3d5e2d38.ngrok.io -> http://localhost:8080
Forwarding http://db0a1b1c.ngrok.io -> http://localhost:3000
Forwarding https://db0a1b1c.ngrok.io -> http://localhost:3000
Connections ttl opn rt1 rt5 p50 p90
0 0 0.00 0.00 0.00 0.00
Step 4: Update the User-Interface Environment File
Replace the API_URL
constant with the public URL for localhost:8080
generated by ngrok
, in the user-interfaces environmental configuration file - located at ./user-interface/src/environment.js
:
// Environment variables
export const API_URL = '{{NGROK_HTTPS_URL_FOR_PORT_8080}}';
export const ORIGIN_PATH = '/v1/origins/';
export const STATUS_PATH = '/v1/status/';
Step 5: Update the EPC Product Interface and Webhook URLs
Authorization: Bearer {{PARTNER_OAUTH_TOKEN}}
Content-Type: application/merge-patch+json
{
"interfaceUrl": "{{NGROK_HTTPS_URL_FOR_PORT_3000}}",
"webhooks": [
{
"resource": "urn:elli:epc:transaction",
"events": [
"created",
"updated"
],
"signingkey": "{{SIGNING_KEY}}",
"url": "{{NGROK_HTTPS_URL_FOR_PORT_8080}}/v1/webhooks"
},
{
"resource": "urn:elli:epc:transaction:event",
"events": [
"created"
],
"signingkey": "{{SIGNING_KEY}}",
"url": "{{NGROK_HTTPS_URL_FOR_PORT_8080}}/v1/webhooks"
}
]
}
Step 6: Update the Back-End Environment File - oAuth Credentials
Replace the EPC_CLIENT_ID
and EPC_CLIENT_SECRET
constants with your environmental configuration file - located at ./back-end/.env
:
EPC_BASE_URL=https://api.ellielabs.com/
EPC_CLIENT_ID={{YOUR_PARTNER_OAUTH_CLIENT_ID}}
EPC_CLIENT_SECRET={{YOUR_PARTNER_OAUTH_CLIENT_SECRET}}
...
Step 7: Update the Back-End Environment File - USPS Web Tools User ID
Register here - https://registration.shippingapis.com/
- to create an account to access the USPS Web Tools, which ZipRight will be using to verify the subject properties ZIP code. Enter the user ID generated for you by USPS in the back-end's .env
file as illustrated below:
EPC_BASE_URL=https://api.ellielabs.com/
EPC_CLIENT_ID={{YOUR_PARTNER_OAUTH_CLIENT_ID}}
EPC_CLIENT_SECRET={{YOUR_PARTNER_OAUTH_CLIENT_SECRET}}
USPS_BASE_URL=https://secure.shippingapis.com/
USPS_LOOKUP_URL=ShippingAPI.dll
USPS_USER_ID={{YOUR_USPS_WEBTOOLS_USER_ID}}
Run the Application:
Step 8: Run each component
User-Interface
$ npm start
Temporary Dependency Issue Work-around
The current supported version of the user-interface dependency react-scripts has an issue with supporting WebSocket WSS connections (which are needed for the React local development server's hot reloading functionality) when tunneling your local development server over an HTTPs connection. To temporarily fix this issue, navigate to
.../epc-hello-world/user-interface/node_modules/react-dev-utils/webpackHotDevClient.js
and replace line 62 of that file with the following before you run the application:
protocol: window.location.protocol === 'https:' ? 'wss' : 'ws',
This issue is slated to be fixed with the next release of
react-scripts
. You can track this issue here: https://github.com/facebook/create-react-app/issues/8075
Once the User-Interface (UI) application is running, you will see a similar output in your shell:
Compiled successfully!
You can now view user-interface in the browser.
Local: http://localhost:3000/
On Your Network: http://192.168.87.38:3000/
Note that the development build is not optimized.
To create a production build, use yarn build.
Back-end
(venv) $ python3 server.py
Once the backend application is running, you will see the following output in your shell:
* Serving Flask app "factory" (lazy loading)
* Environment: production
WARNING: This is a development server. Do not use it in a production deployment.
Use a production WSGI server instead.
* Debug mode: on
* Running on http://0.0.0.0:8080/ (Press CTRL+C to quit)
Set Up Test User Access within Encompass Application sandbox
We will set up test user access in Web Version of Encompass as the host Encompass application for the purposes of this exercise.
Step 9: Entitle your test Encompass user to access your application
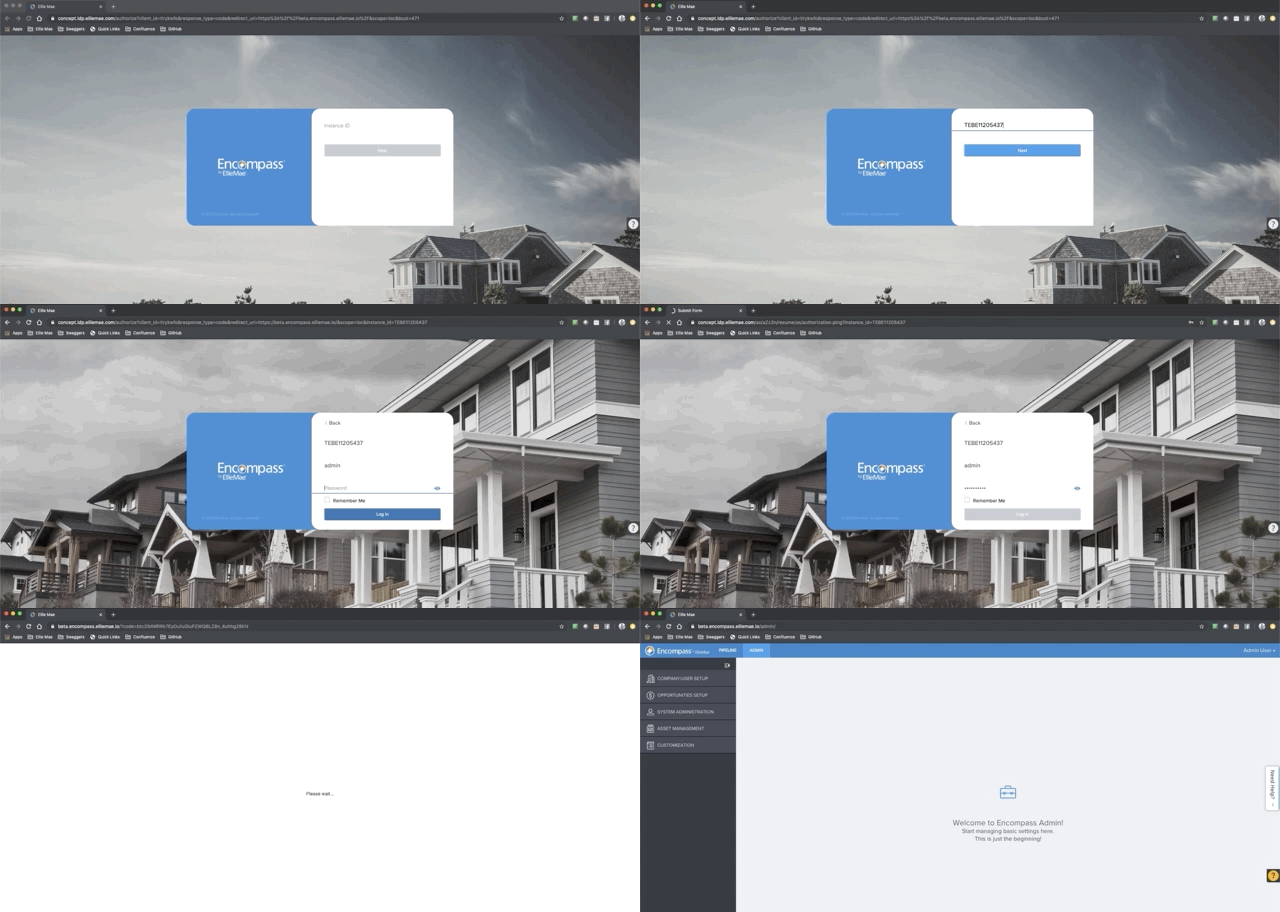
- Navigate to
https://www.encompassloconnect.com
. Login with your sandbox Encompass instance admin credentials:
- Navigate to Services Management. Select the service category under which you listed your
product
:
- Click the Add button on the top-right of the Manual Ordering section. Select your product as listed in the dropdown and click Create:
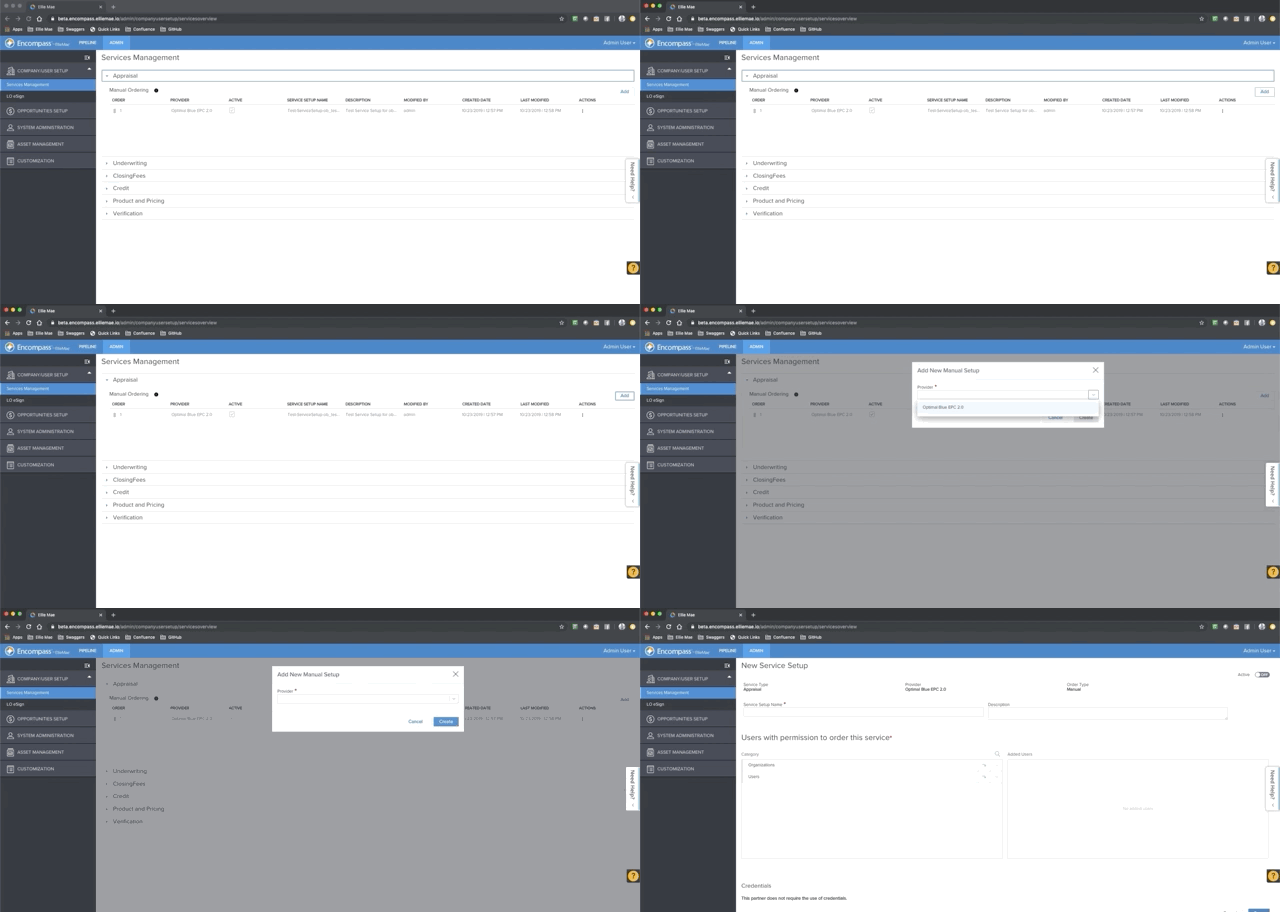
- Give the manual Service Setup a name, add your regular/non-admin Encompass test user to the authorized users list, and click Save:
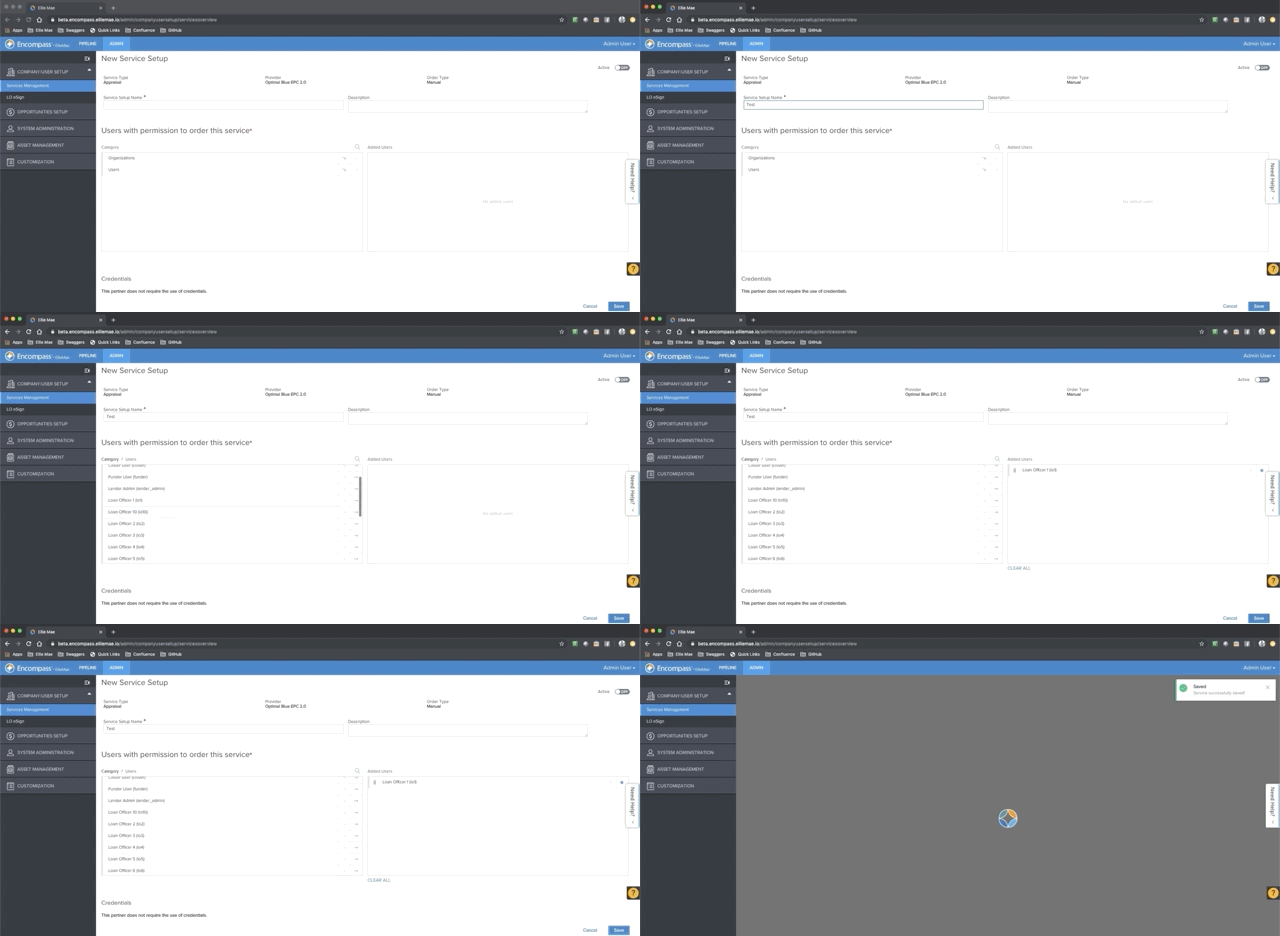
- The new Service Setup you created will be on the Services Management page. Make sure it is marked as Active:
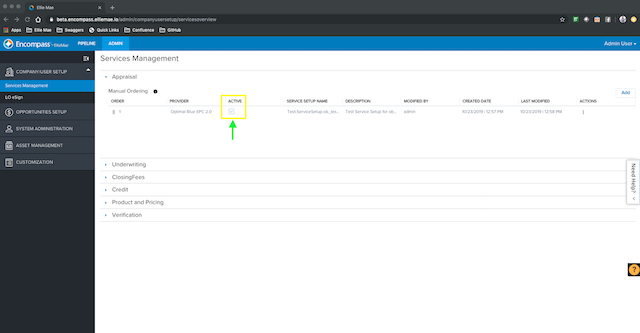
Your regular/non-admin Encompass user now can access your application from within a loan file!
Step 10: Configure Integration credentials for your test Encompass user
ZipRght expects dummy_username
and dummy_password
to be received as the username and password credential fields, to model an illustrative authentication workflow. We need to make sure our test user is set-up so that these credentials are shared with the ZipRight application when the user launches the application:
Step 11: Launch your application within Web Version of Encompass!
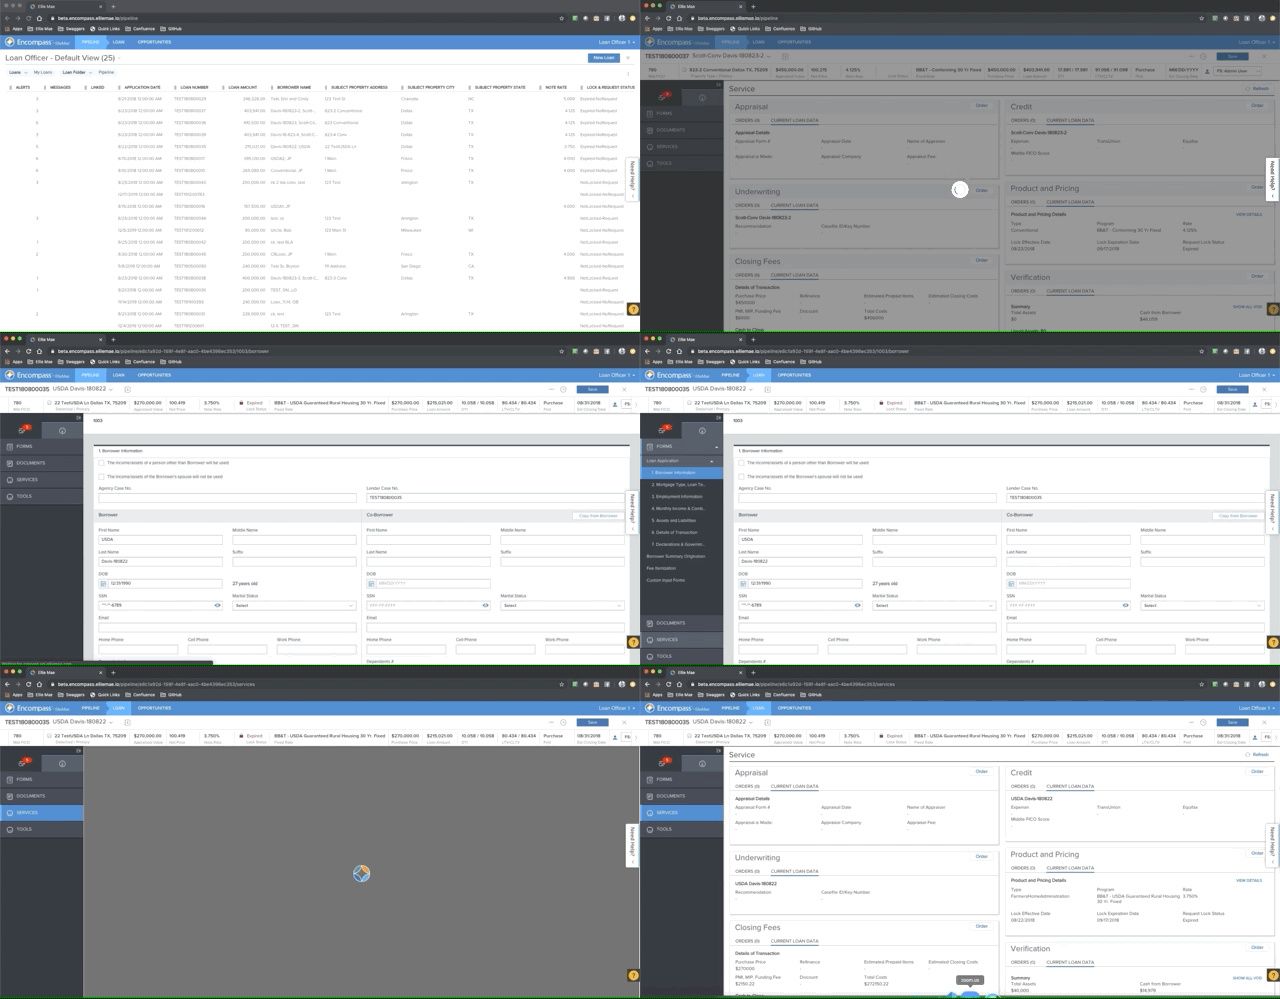
- Log out and log back in as your regular/non-admin Encompass test user. Select an existing (or create a new) loan from the pipeline, and navigate to the Services tab from the loans side-nav:
- Click the Order button on the service category card under which you have listed your
product
, and your application's UI will launch! If you have created (and activated Service Setups for) more than one product under the given category, you will see a dropdown list of products to choose from, as shown below:
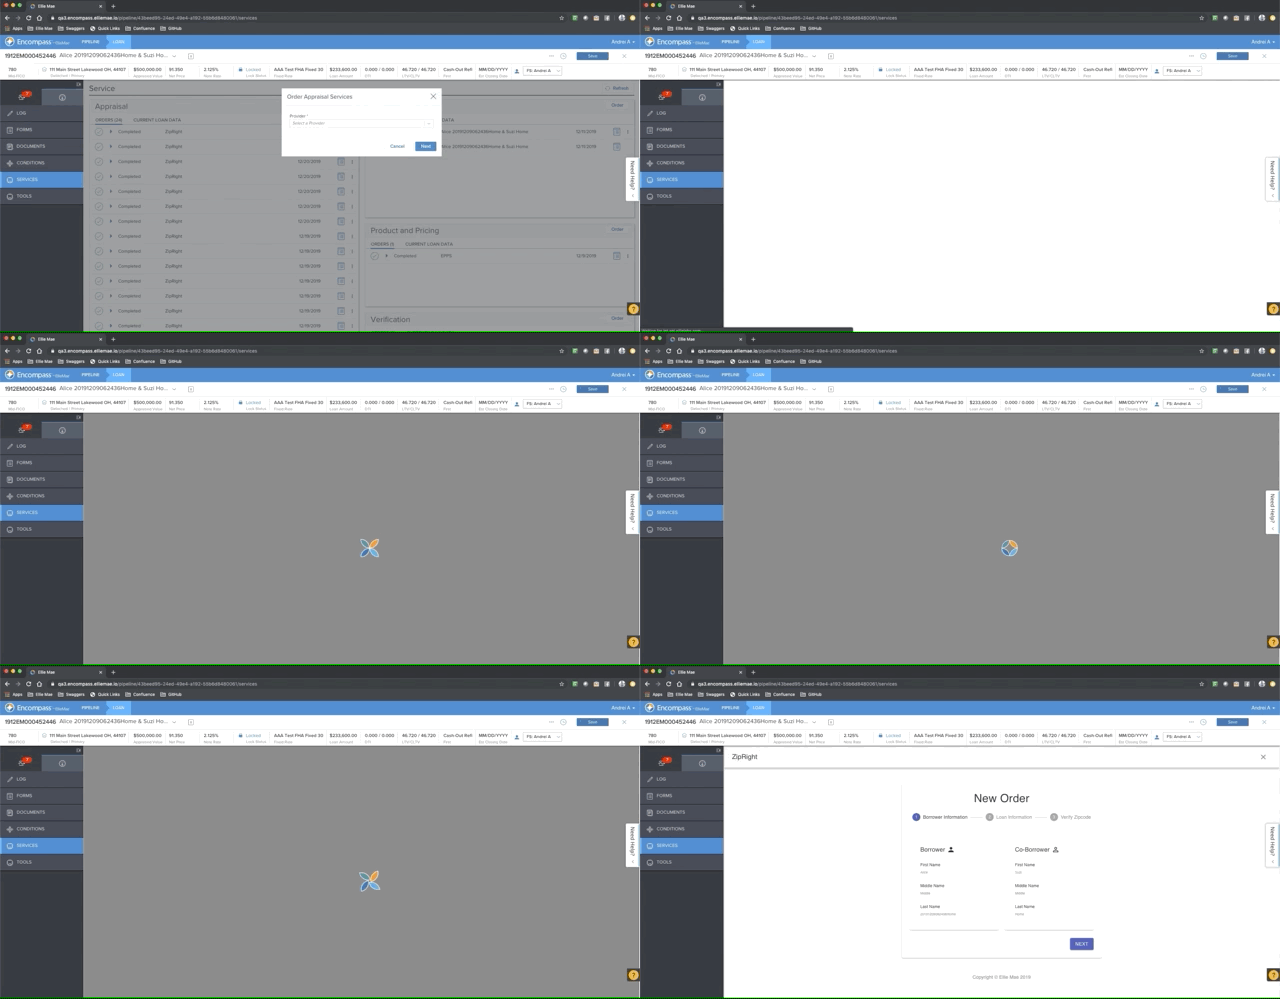
Great! Your application's UI, which is being served (via ngrok
) from localhost:3000
, is accessible within Web Version of Encompass. You can now test your application as an Encompass user.
Updated 12 months ago